
Now we’ve added constraint networks, in order to destroy the fractured geometry there has to be some sort of force acting on it to break those bonds. As we have seen this can be done with another piece of geometry – often referred to as a “Hero Object”. This works well for people colliding with things, as well as vehicles, bits of scenery and ballistic objects like cannonballs.
https://youtu.be/XcQdB2j7Qbw?t=212
Throughout this fight scene there are a series of fractured geometry as the fight destroys the city, for the most part these are done when one object – normally a character – collides with a bit of scenery.
But what about for explosions and shockwaves? For these, and other invisible forces like any magic effects, often other geometry is not the way to go to destroy constraints as it may not provide the correct look. The solution to this then is to create an invisible velocity field that will apply velocity to the fractured pieces. There are a few ways to do this but the one I will be using essentially involves scattering points across a bit of geometry, giving them normals, skewing those normals in the desired direction and giving them a magnitude that can then translate to velocity.
Setting up the field
Firstly drop down a Sphere set to be a Polygon Mesh, change the radius to whatever the desired size is and then reposition it using a Transform to wherever you want the centre of the explosion to be. To scatter points within the sphere convert it to a volume using an ISO Offset with the Uniform Sampling Divisions increased to at least 50 if not 100. Then connect a Scatter to the bottom of chain with the Count set to something like 500. If you display your point normals you will see there are currently none, to do this drop an Attribute VOP at the bottom of the chain.
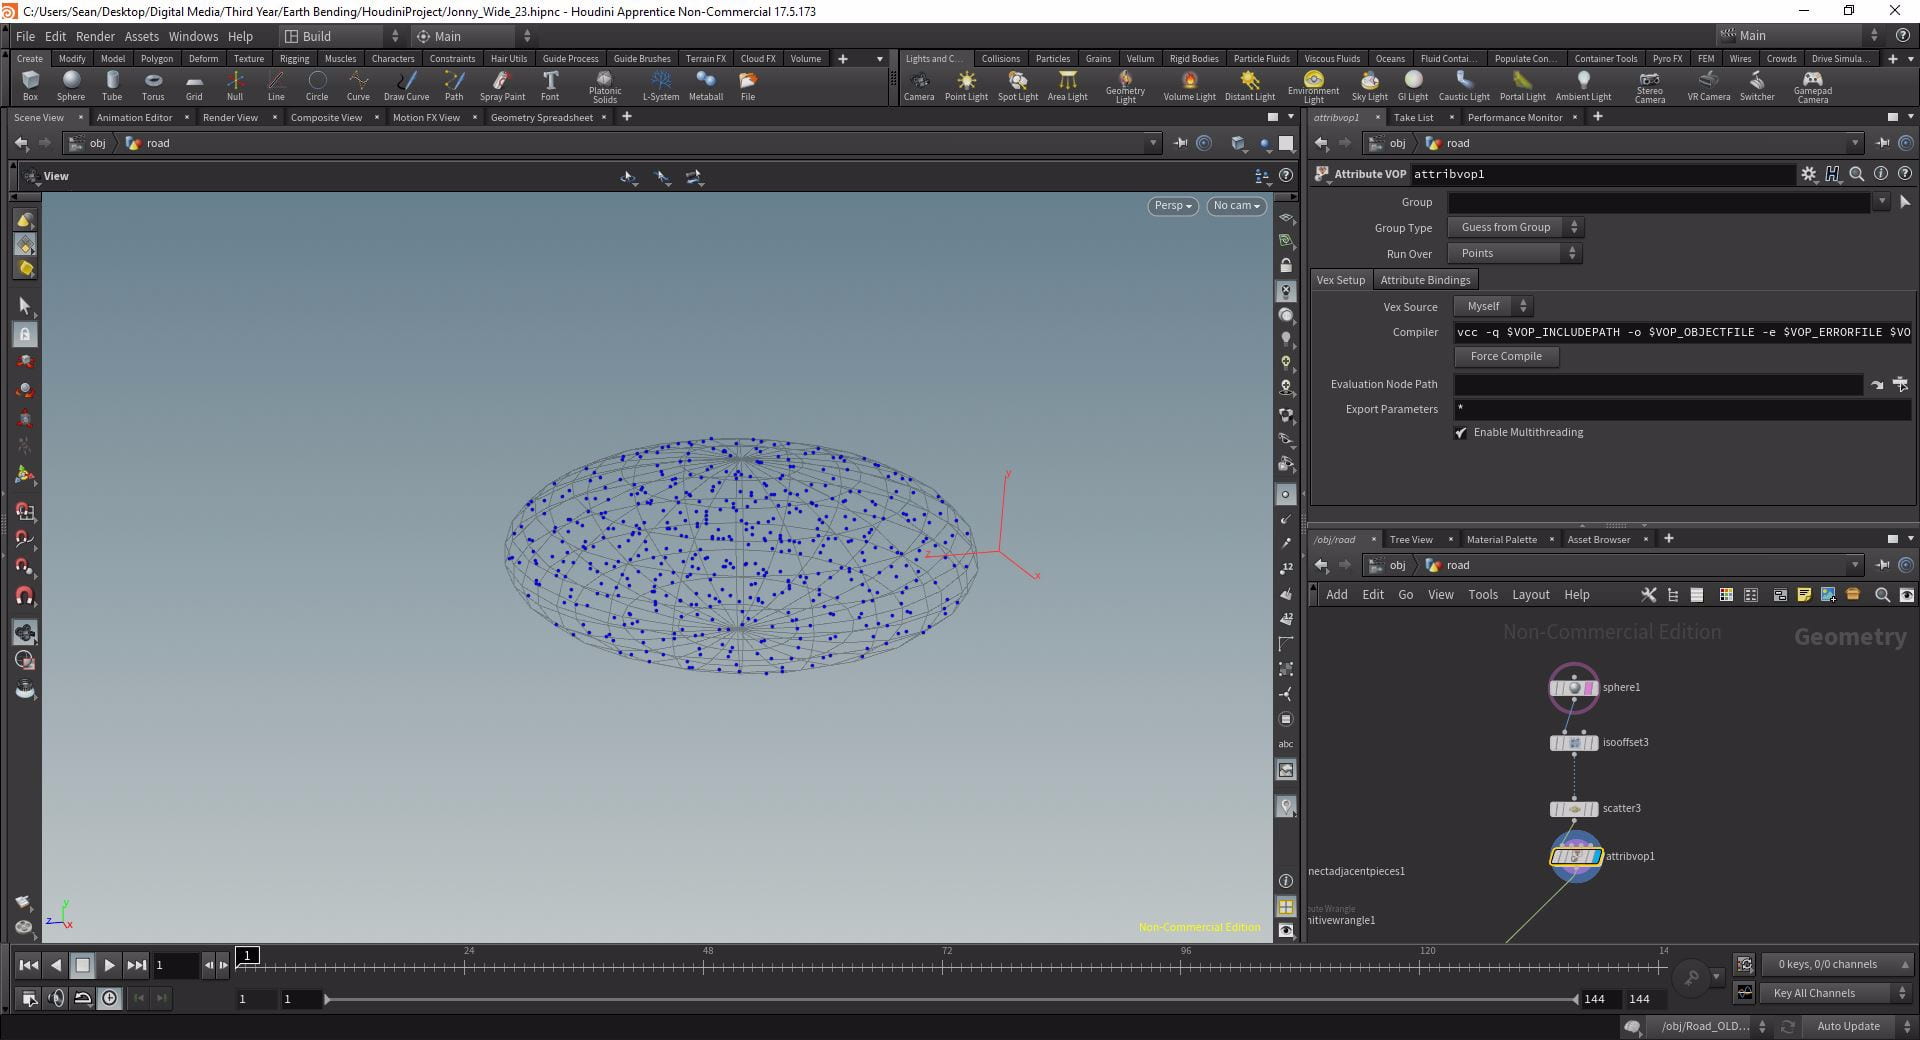
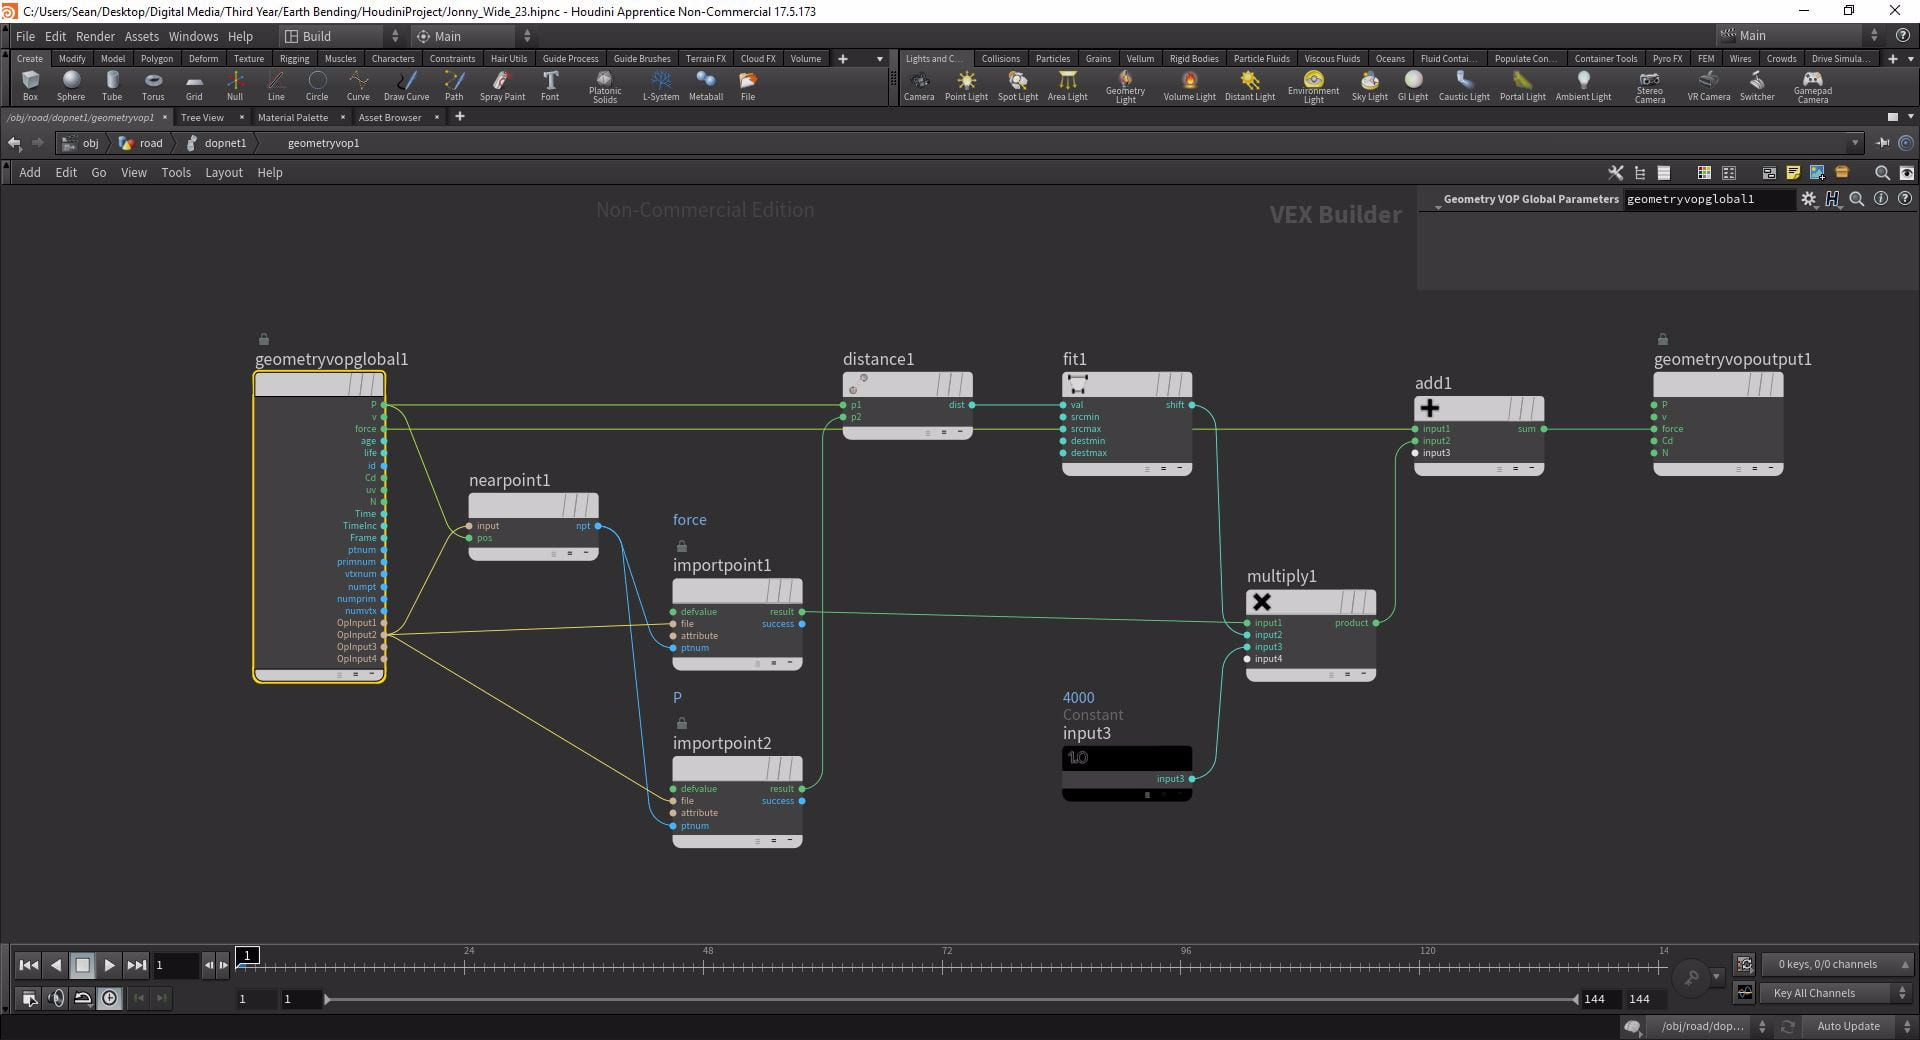
WITHIN THE ATTRIBUTE VOP
We want to first calculate the actual normals of the points relative to the centre of the sphere, so the first step is to calculate that centre. To do this drop down a Bounding Box VOP with Opinput1 plugged into the File, this will create a bounding box based on our sphere. Then we need to essentially calculate the mean average point; so drop an Add with the Min connected to Input 1 and the Max to Input 2 which will add the two values together. Then connect the Sum to the first input of a Divide and connect a Constant with a Float of 2 to the second. We now have a rough centre for our sphere.
To calculate the normals for our points we need to subtract this centre value from the position of our points. Drop a Subtract with the first input connected to the P output of the Import and the second input connected to the divided value, now if we plugged the result into the N input of the VOPOutput and displayed normals we can see our points all now point away from the centre so now we have vectors pointing out creating a blast force.
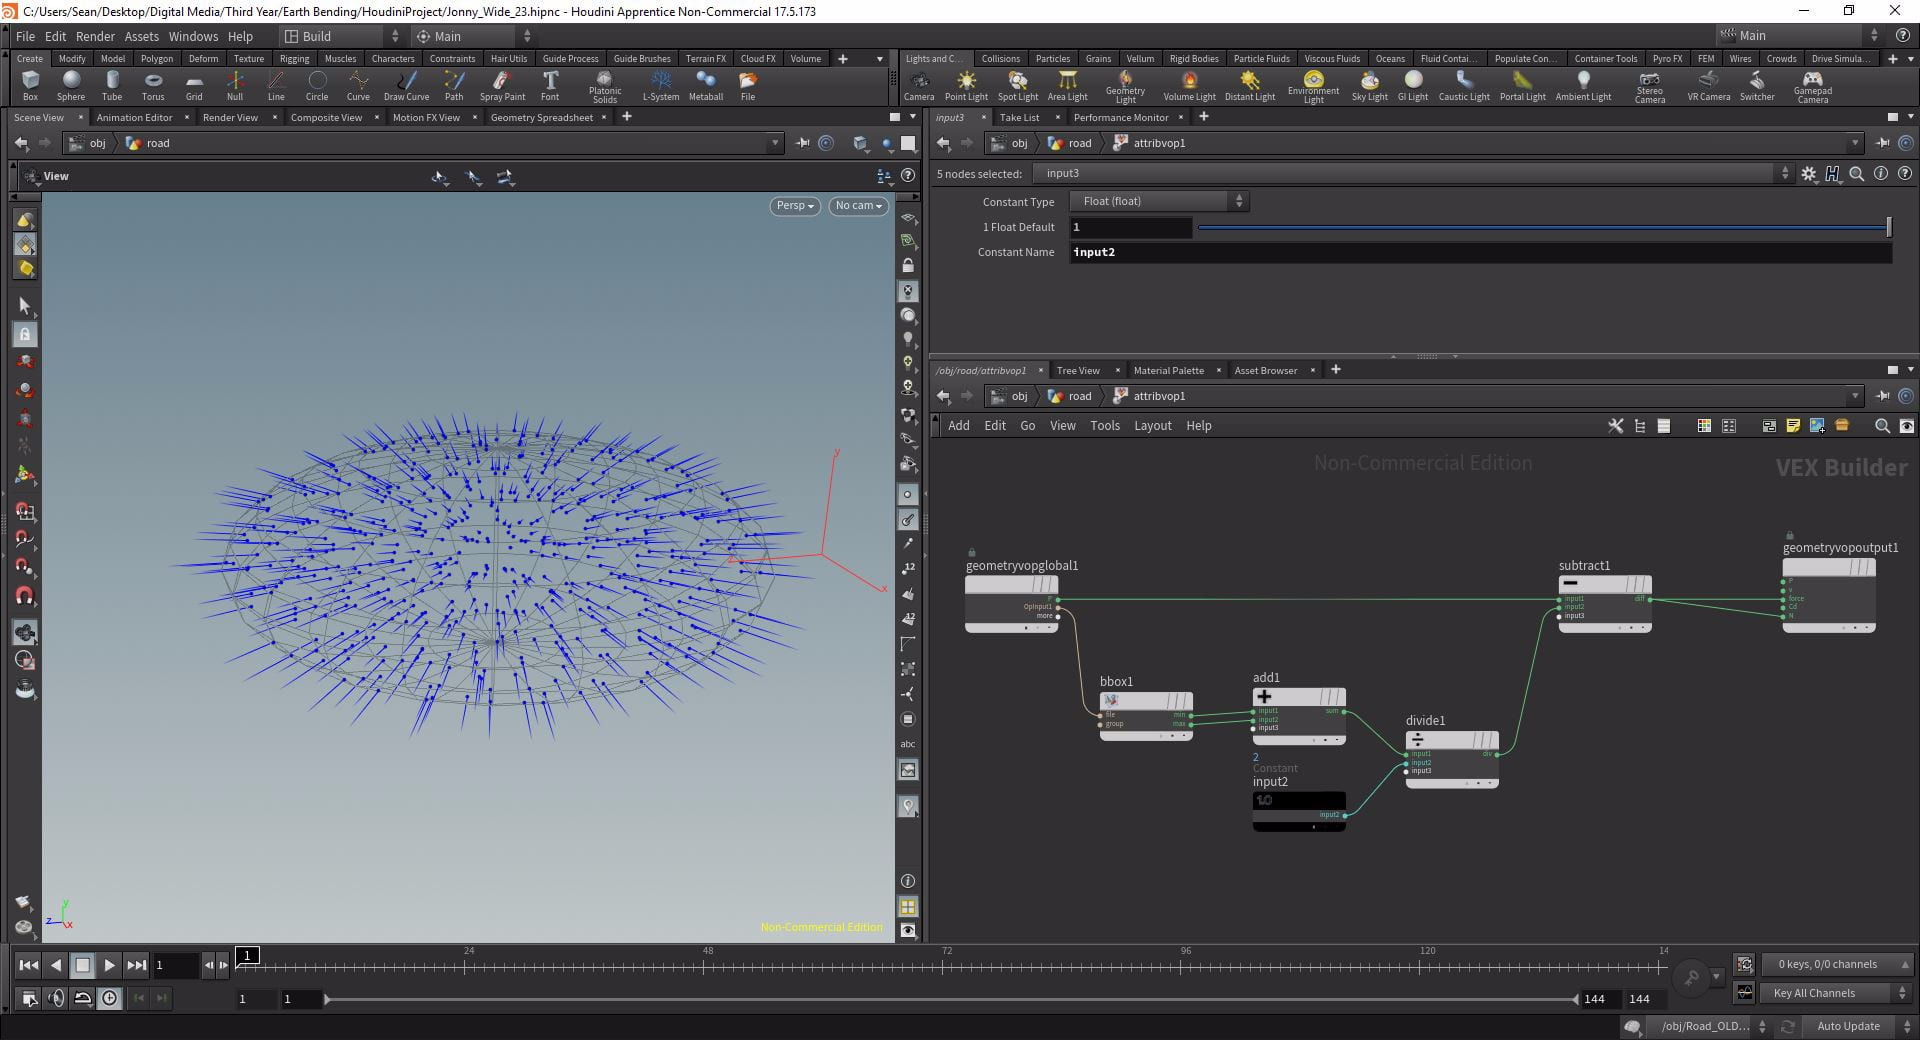
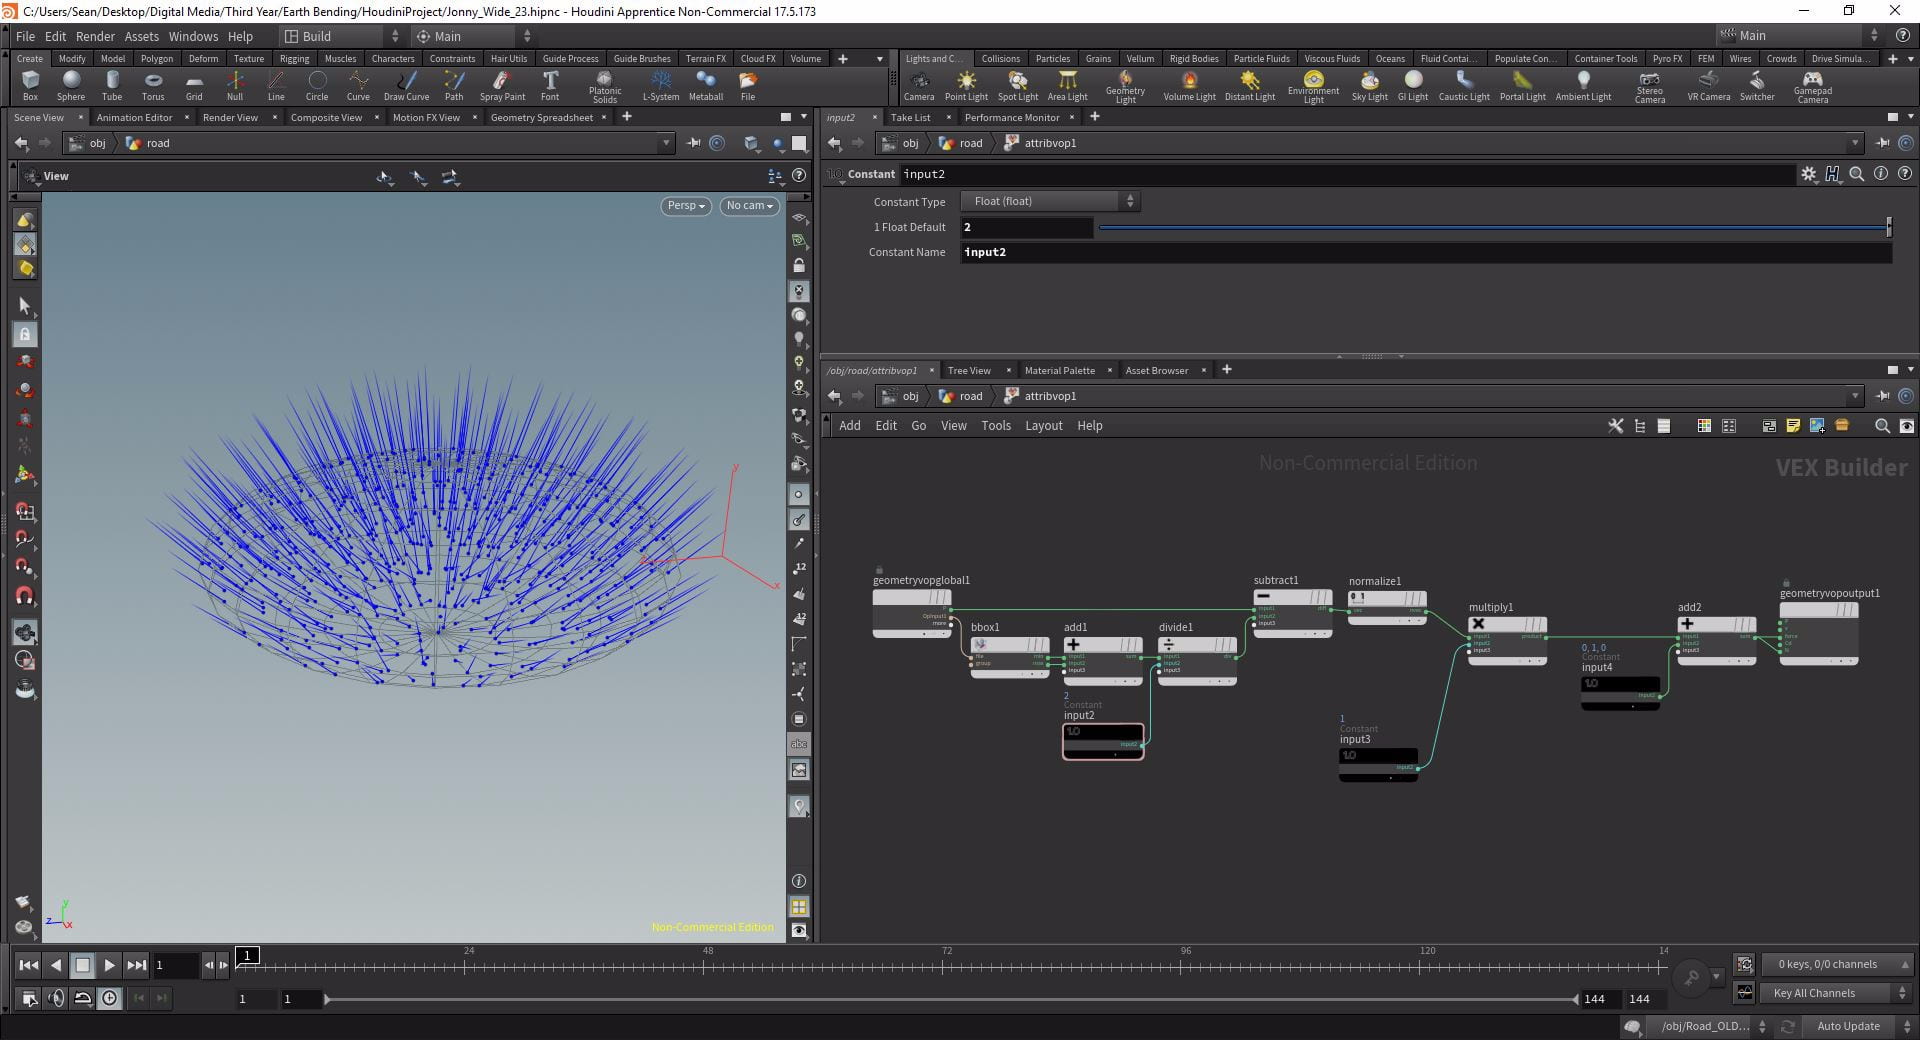
The next step is creating a magnitude modifier so we can control the strength of the explosion. Firstly we’ll make sure all the values are between 0 and 1 to give us a baseline so drop a Normalize VOP after the Subtract. After that connect a Multiply via Input 1 and connect another Constant to Input 2, this Constant will serve as the multiplier for the magnitude.
Lastly we need to be able to control the direction. At the moment our blast force is ready if we want to explode equally in all directions but if we only want to explode in one then we need to be able to control the vector. Drop another Add after the Multiply with a third Constant connected to Input 2, but this time change the Constant Type from Float to Vector, now we can control the direction by modifying these three values. Currently this is just giving our points normals and cannot be used to blast anything so the last step is to connect the Sum of the last Add node to the Force of the VOP Output.
Applying the Force in SImulation
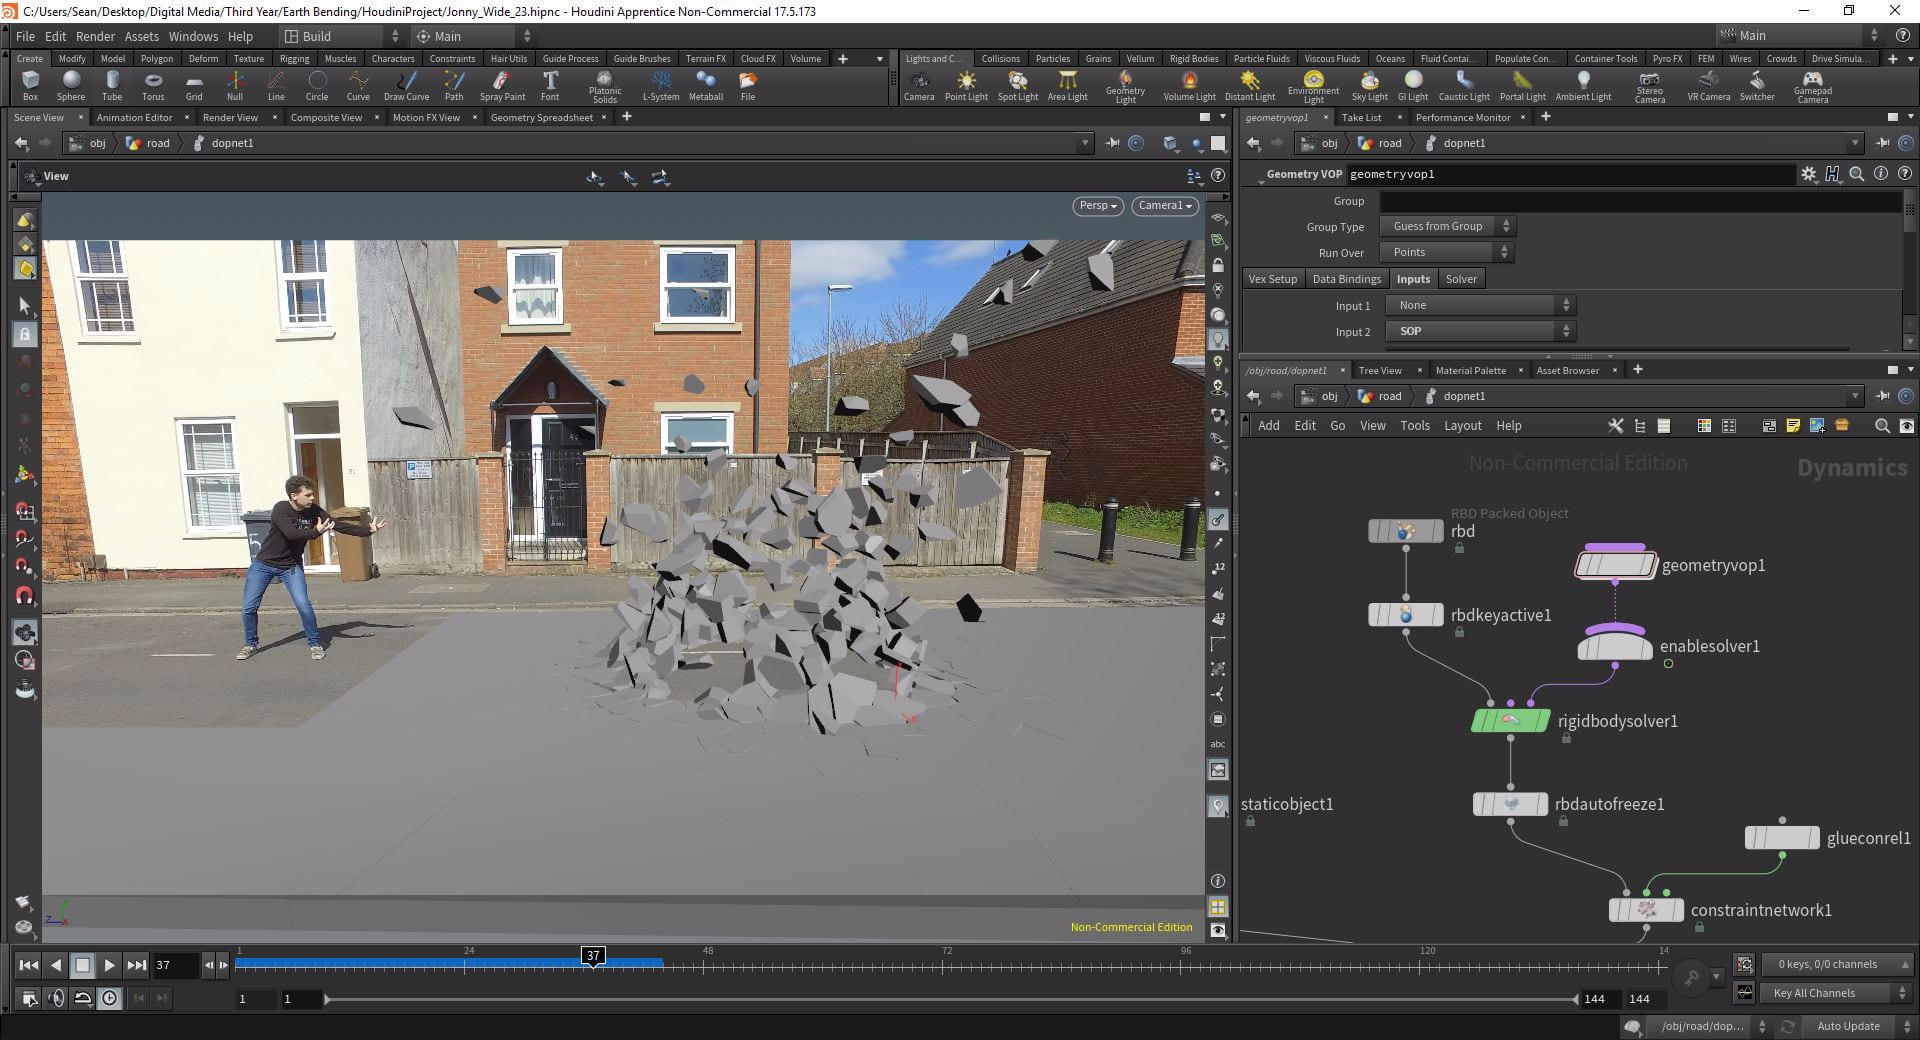
The way this workflow operates is by taking the blast field and the fractured geometry and saying if a piece is near enough to a point in the field then take on it’s velocity. To bring the force in and apply this go into your DOP network and connect a Geometry VOP to the third input of the Rigid Body Solver. In the Inputs tab change Input 2 to SOP and point the path at the blast field, I used a null labeled OUT_FORCE.
Calculating Nearpoints
To calculate the pieces that will inherit the velocity go into the Geometry VOP and drop down a Near Point VOP with the Input connected to Opinput2 (our blast force) and Pos connected to P (the position attribute of our fractured pieces). Now we have grouped the pieces that we will apply our force to we have to actually apply it, drop an Import Point Attribute and connect the NPT output of the Near Point to the Ptnum input and Opinput2 again to the File. We don’t want to inherit the position which is the default attribute, we want the force attribute so change the Attribute to force.
Refining the transfer
We don’t just want to apply the same velocity to every piece or the explosion will look very uniform, so first let’s calculate the distance between the points. Drop another Import Point Attribute, this time with the default attribute of P left as is, but with the same inputs as the last. Then to calculate the actual distance drop a Distance VOP with P1 connected to the P output of the Geometry VOP Global and P2 connected to the Result of the second Import Point Attribute. My VOP network was getting quite cluttered at this point so I duplicated my GVG and reorganised my network so I had the same input/output connections but with less wires crossing. Now, using a Fit Range VOP we will control the maximum distance from the blast field that pieces can be to inherit the velocity. Plug the Distance into the Val input and then invert the Destination so it goes from 1 – 0 instead of 0 – 1 and then change the Source Max to whatever the maximum distance you want (I used 0.3).
Applying the Force
We will apply this Fit Range as a multiplier to our force so drop a Multiply and connect Input 1 to the Result of the force Import Point Attribute and Input 2 to the Output of the Fit Range. We need to add this force now to the original force so drop an Add, connect the Force of the GVG to Input1 and the Output of the Multiply to Input 2, then connect the Output of the Add to the Force input of the Geometry VOP Output. Lastly we will connect a Constant to Input 3 of the Multiply which will add a multiplier to control the magnitude – I gave this an initial value of 100.
Conclusion
Now if you jump back to DOP level and watch the simulation your geometry should be blown apart by this blast force. This is a very powerful tool and can easily be remade or just copy/pasted over to any future simulation. By creating all those constants throughout we can now easily increase or decrease the power of the explosion but also the direction of the vector so if you, for example, wanted to explode a wall outwards or a floor upwards you could push all the point normals in one direction.
Tutorial Video
In this video I walk through the process of creating a destructive force from a sphere and brining it into DOPs to be applied to pieces:
References
- Pluralsight (2015) Architectural Destruction in Houdini. Available from https://app.pluralsight.com/library/courses/houdini-architectural-destruction/ [accessed 25th March 2019].