Having experimented with destruction and fracturing in a number of contexts I’ve spent this next period of time planning for the live action shoot and practicing the techniques I will use to add the CGI to my footage. To inspire myself I watched a series of videos and FX montages and found a few that significantly influenced my work:
All of these include a significant amount of destruction FX and for the most part it is integrated with other elements such as fire or water. I was particularly inspired by the element work from The Last Airbender, the scene from Fantastic Beasts where he rebuilds the house, and the sections from Game of Thrones where the dragons destroy the boats. Therefore for my main live action shot I thought I would do some elemental destructions – specifically a road exploding from below.
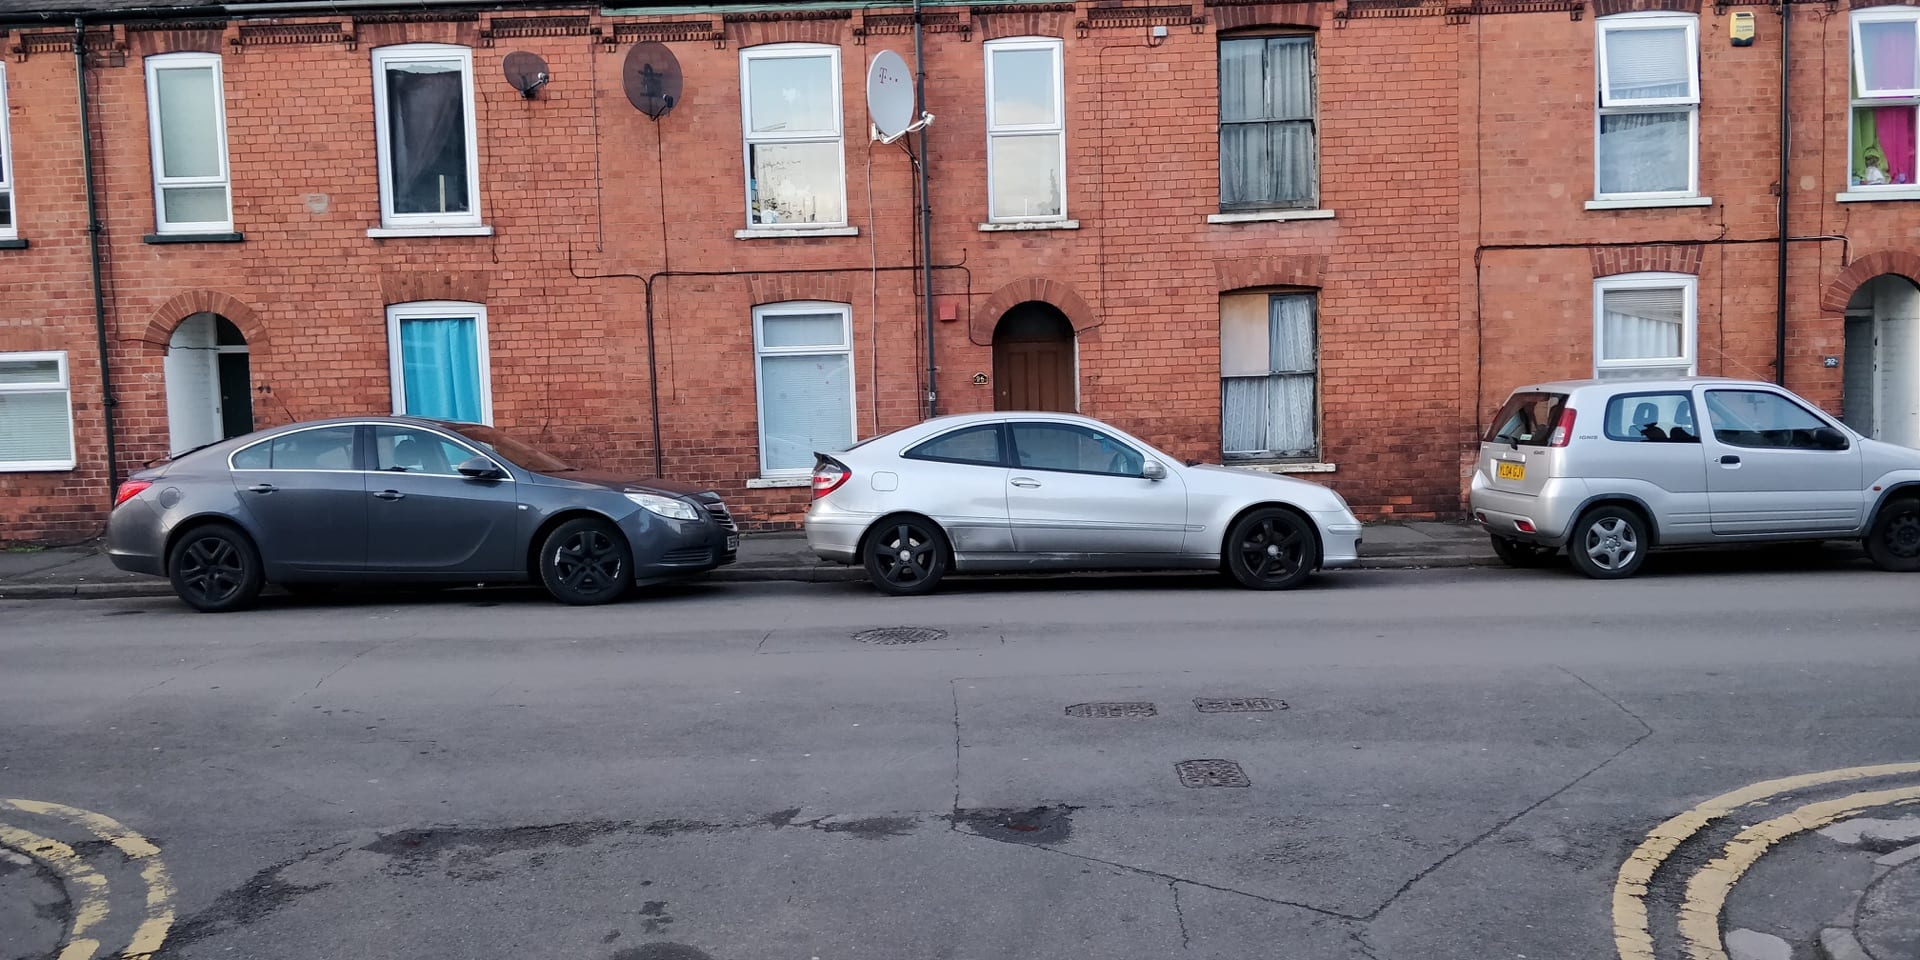
I already had an idea of the location I wanted to film, a backstreet around Sincil Bank in Lincoln so I went and took a photo of the area so I’d have something to reference for size, however the location is not especially unique and could easily be done in a similar location.
The Houdini Scene
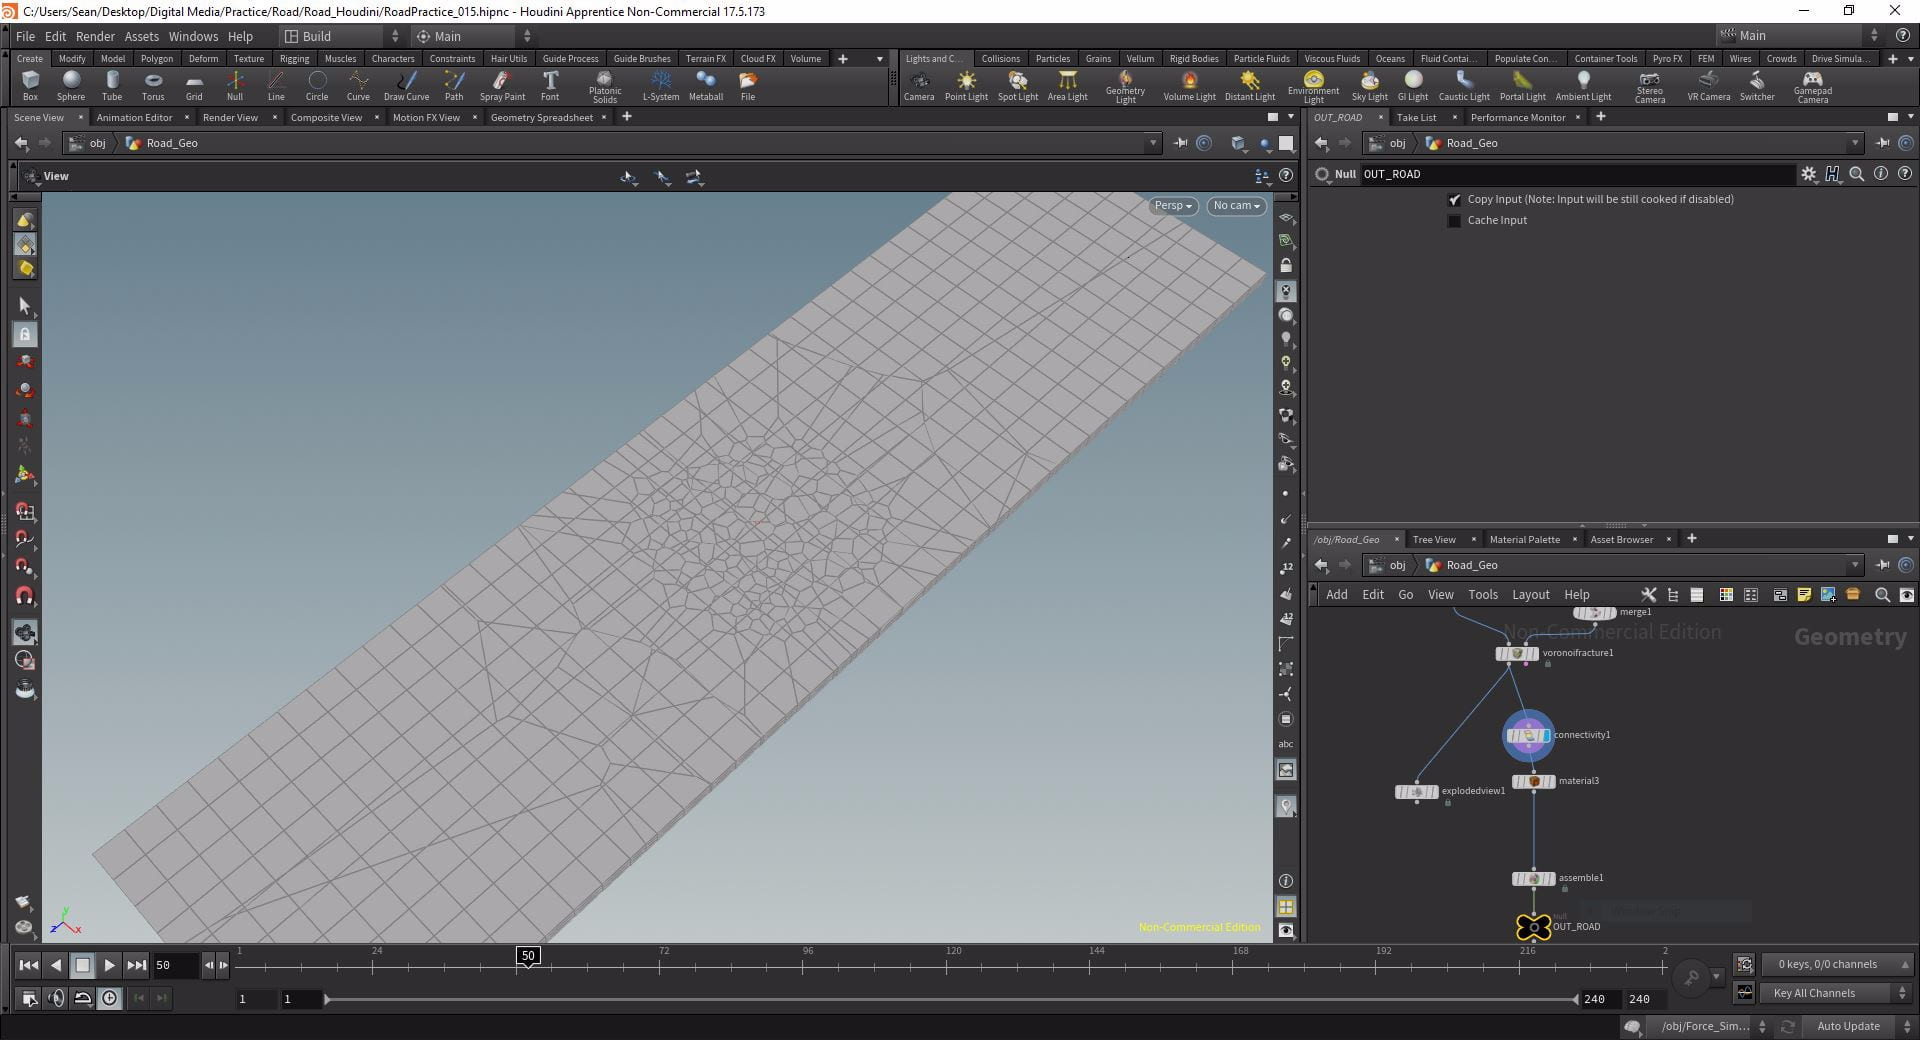
With my reference location I started building my scene in Houdini. I started with a ground plane and set up a Voronoi fracture, created two layers of scattered points, one with a very low concentration of points across the entire plane, and another with a very high concentration only in the area I wanted the explosion.
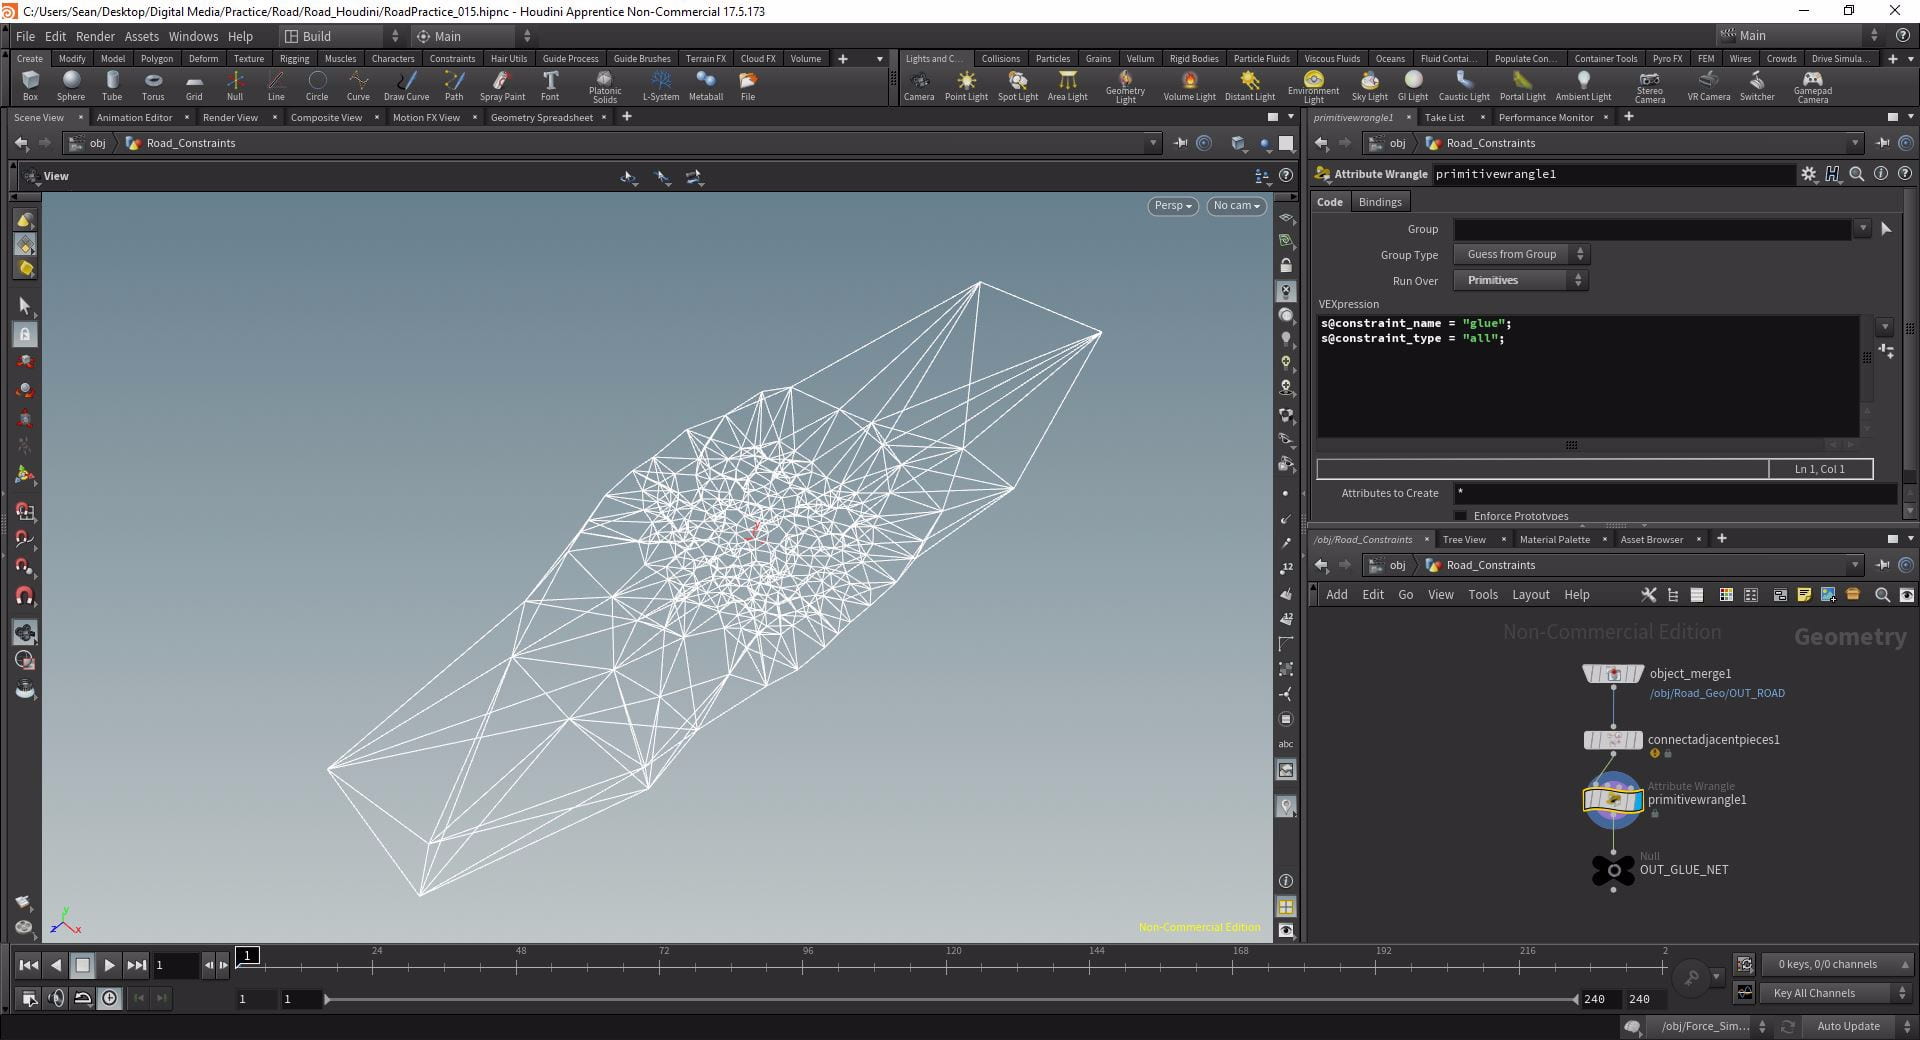
With my fractured road I brought it into DOPs and set up the simulation. I brought in the fractured geometry and set up my colliders including a ground plane, my street geometry and a road collider. I then had to create a constraint network to hold the pieces together so created a new branch off the connectivity node with a Connect Adjacent Pieces and Primitive Wrangle.
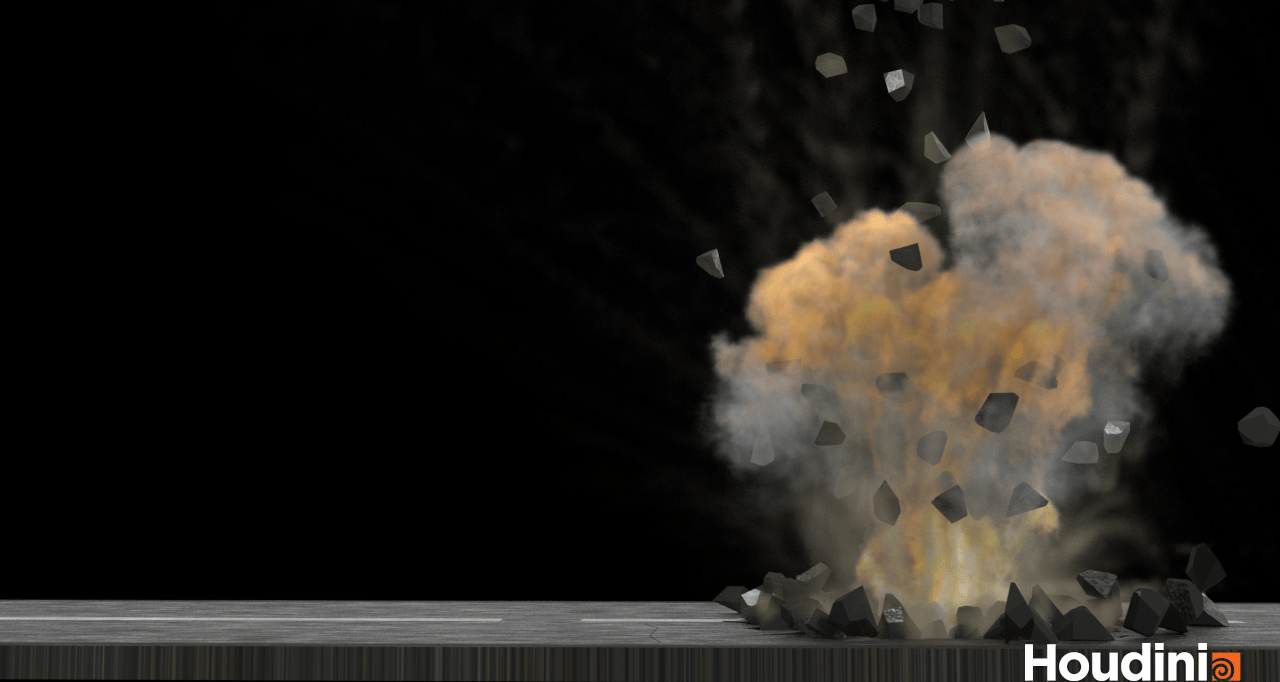
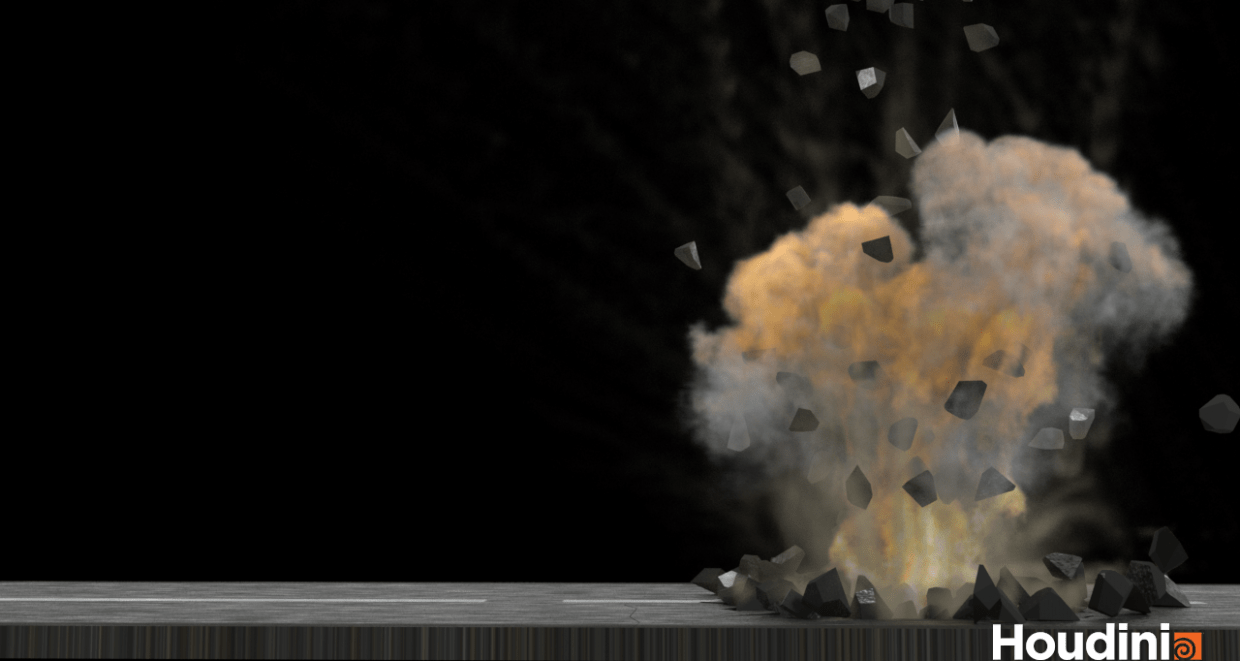
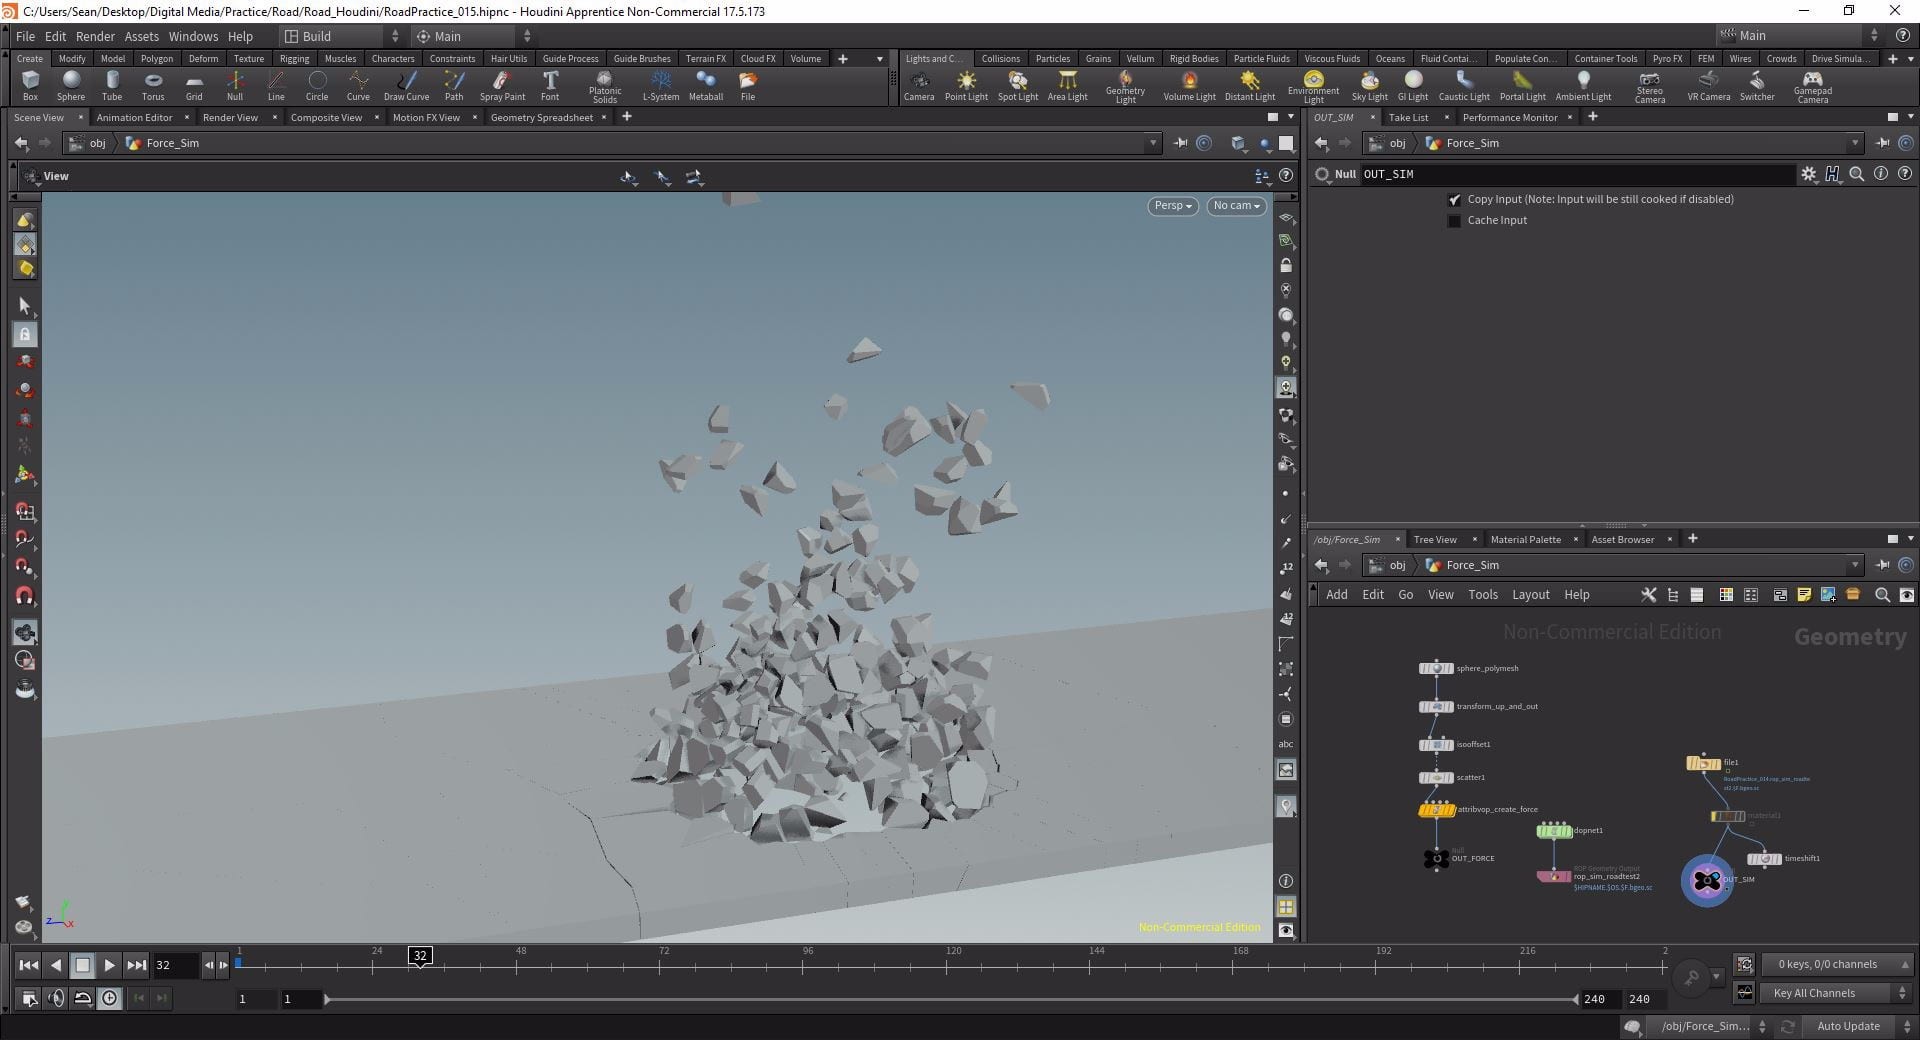
In order to actually make the road explode I scattered points inside a sphere located just below the explosion area and gave them a force attribute pointing upwards in y. I then brought this and my constraint network into DOPs and applied them to the simulation. After tweaking the strength of the glue network and amplitude of the explosion I found a look I was happy with and cached out the simulation.
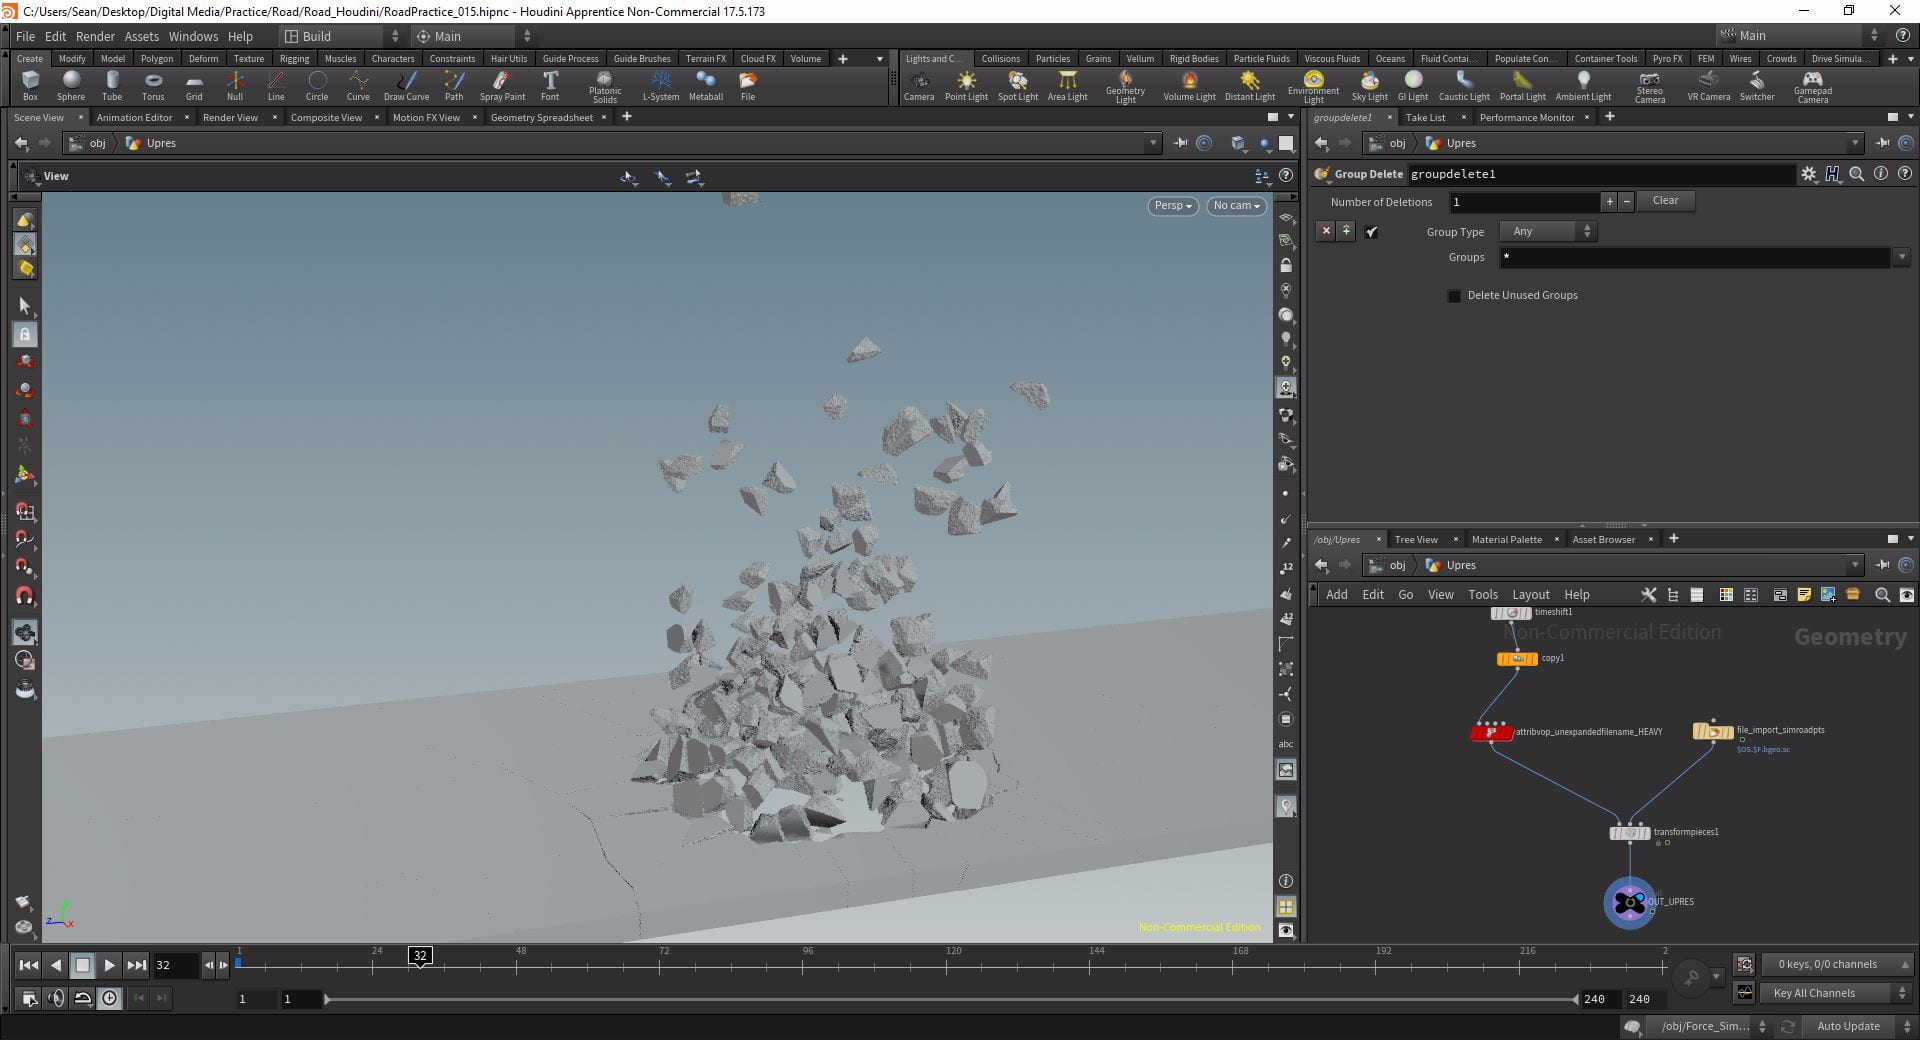
With my simulation cached I took the pieces into a separate geo network, isolated the exploded ones, and increased the piece resolution to add some interior detail to the fractures. This involved isolating the inside group created by the voronoi fracture, creating a VOP Network to control the level of noise, and create a series of masks to preserve edges that needed to remain straight.
With the fracture completed I then chose to add another element to my scene – a fireball. While the scene did look good already I wanted to have multiple layers to work with so I created another sphere in the centre of the explosion and used the shelf to create a fireball. This generated all the required geometry networks which I then tweaked to get my desired look. I increased the flame height significantly and lowered the separation to get flames of a higher resolution then once I was happy with the look cached out the flames.
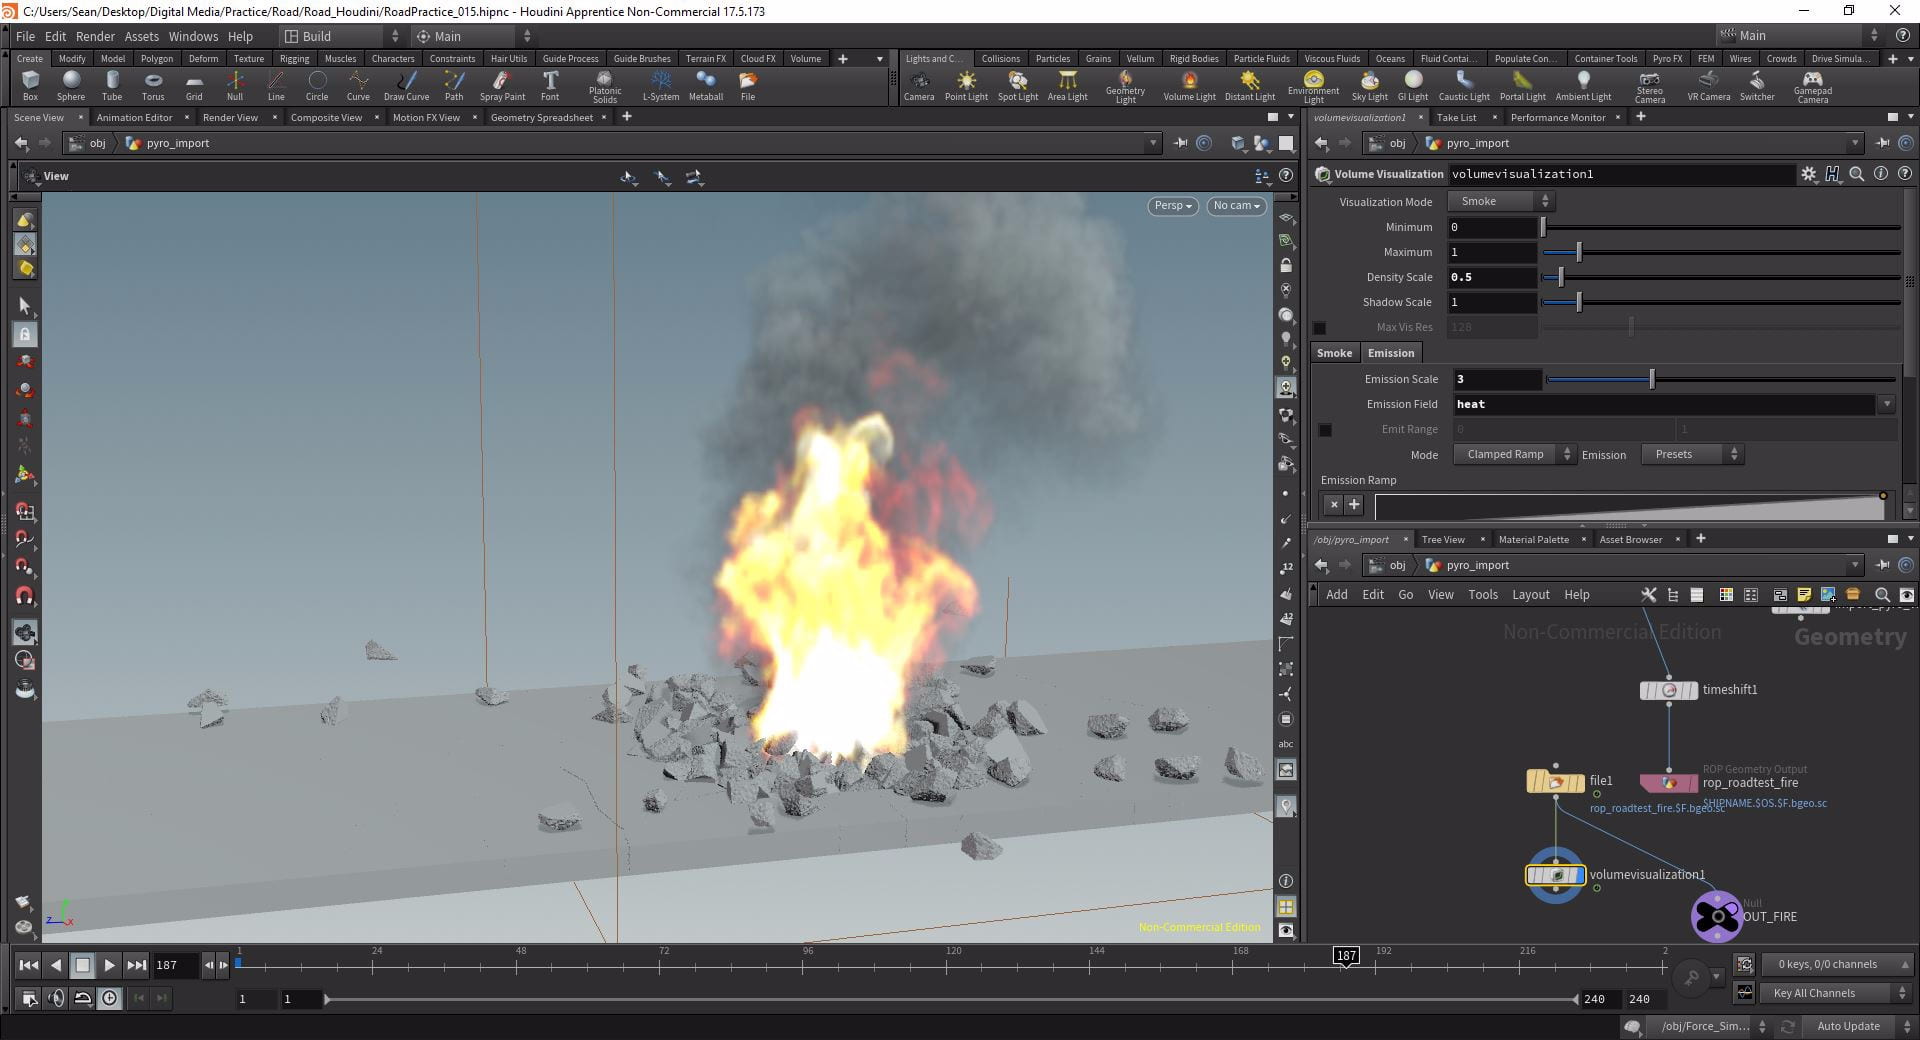
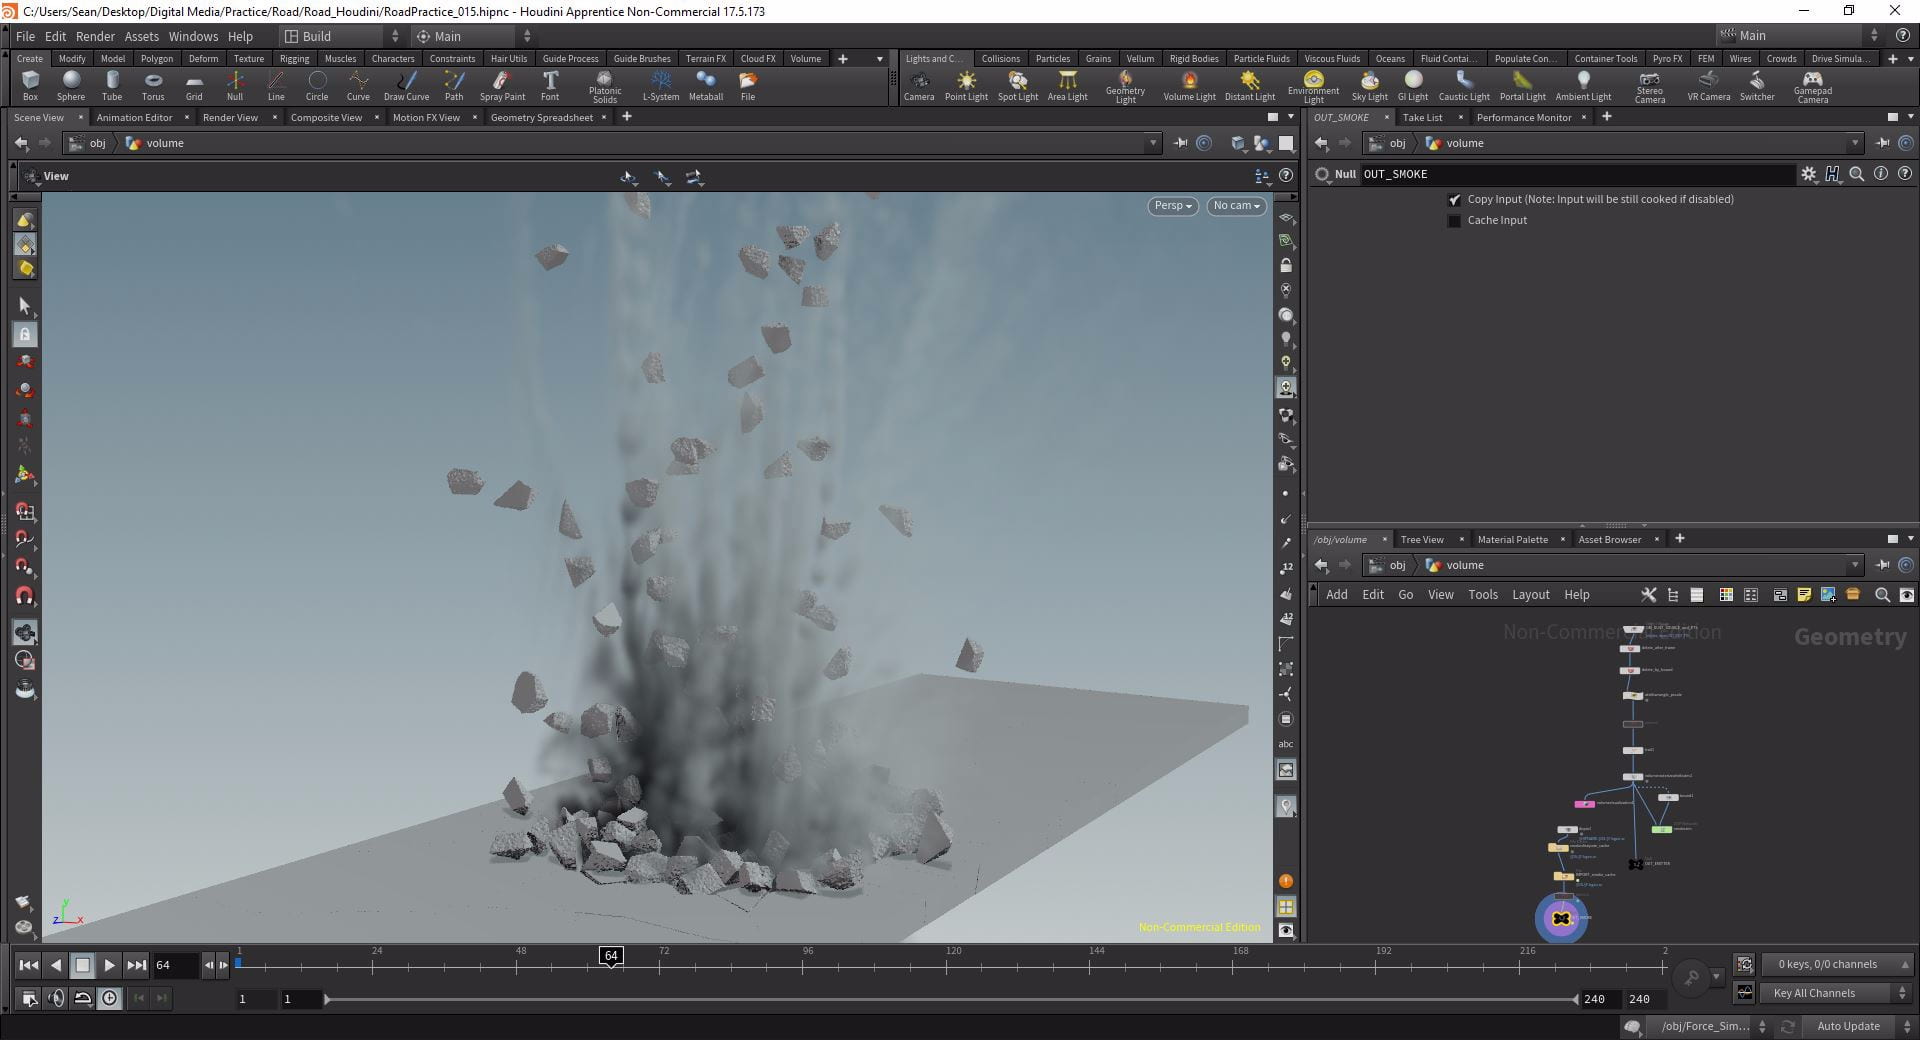
The final layer I added to the simulation was a thick cloud of dust that was generated at the point of explosion and dissipated over a couple of seconds. While the initial debris looked good by itself the sim was definitely missing an extra layer of detail so I created a series of networks to generate dust. This was the only technique I had not practiced before hand and it required a lot of research to figure out. Firstly I created a source network that generated points from pieces as they fracture one another, then in a particle simulation I emitted more points from these source locations. I then gave these points density and scale values as well as a temperature attributes and using a pyro solver generated the thick dust I wanted. Afterwards I found out the last step was not required and I could, instead, just rasterise the particles I created from my initial simulation if I had a sufficient point density and create a volume from that, a technique I used in later simulations.
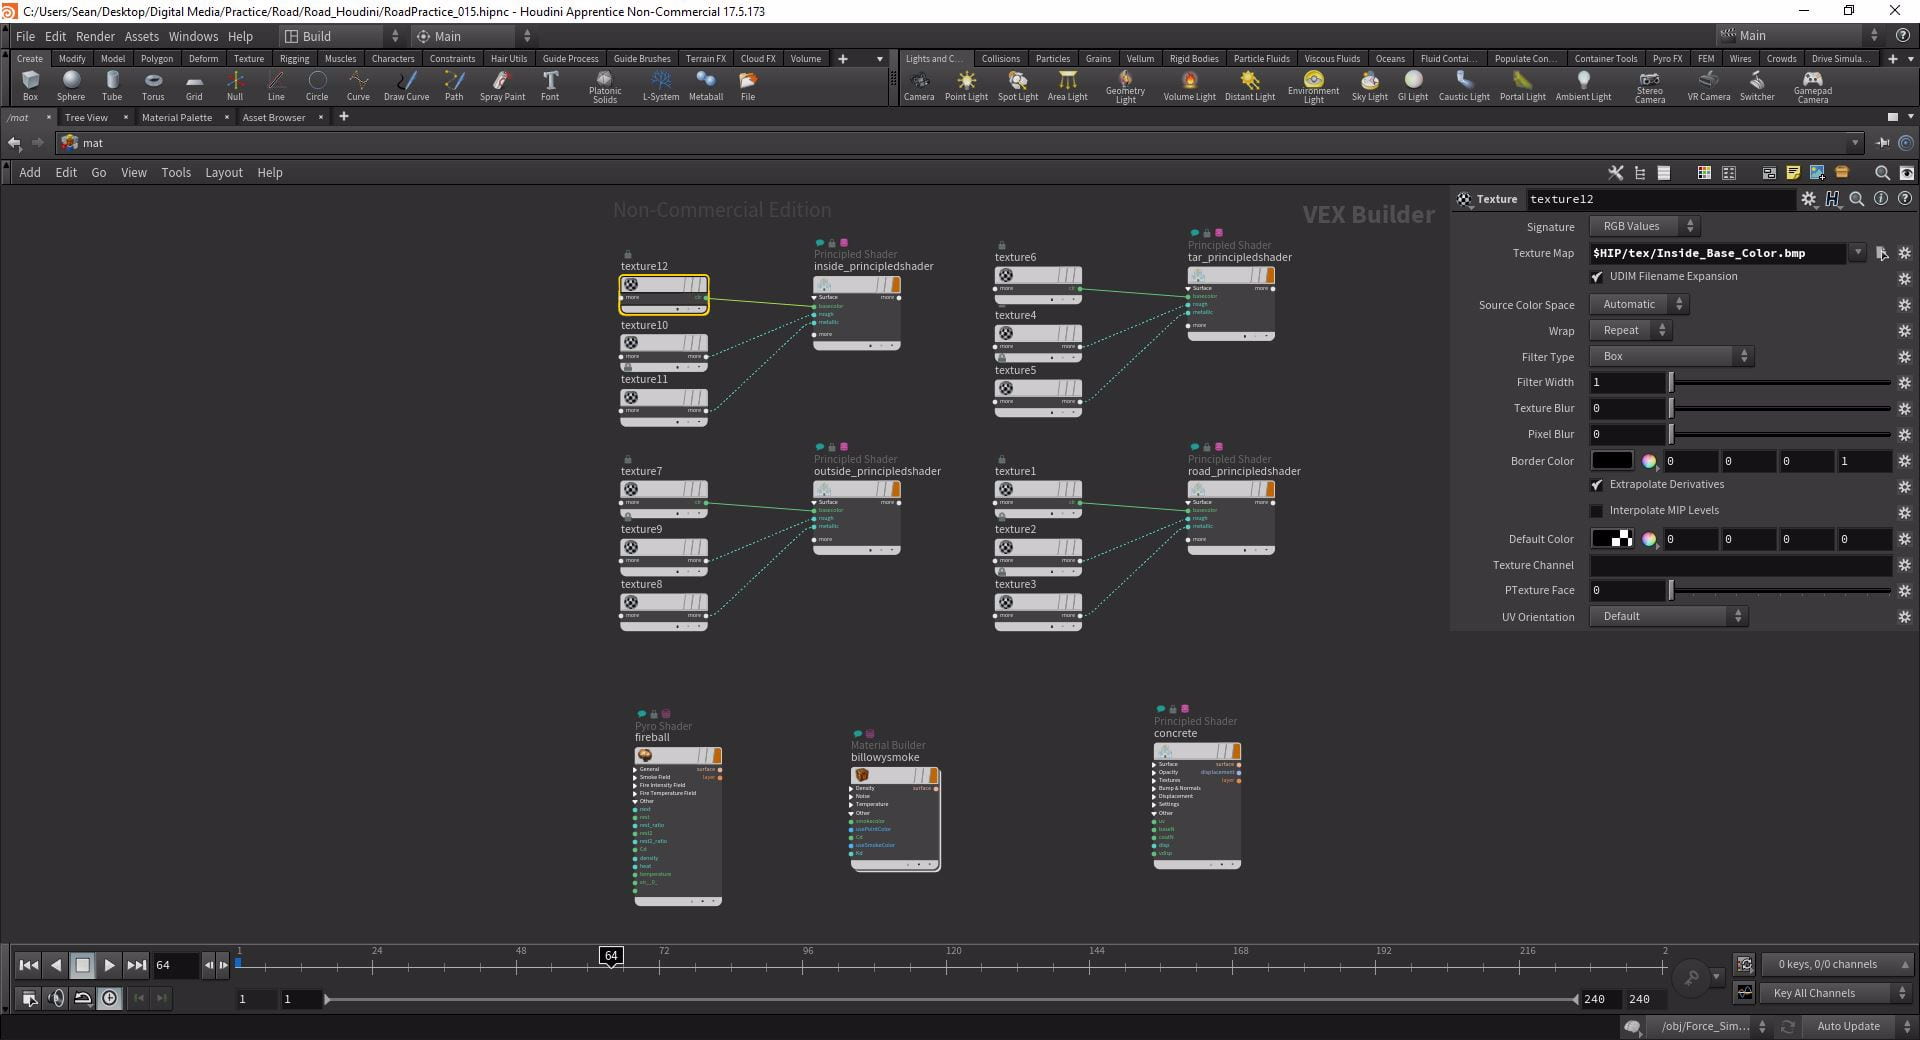
With my simulation complete I moved onto the materials. Using the groups inside and outside created by the voronoi fracture node I was able to texture the interior of the fractured pieces different to that of the exterior. I therefore built two materials using the principled shader provided by Houdini with materials I created myself using Bitmaps in Substance’ B2M. Additionally I tweaked the fire material and set up a mesh light so the fire would actually contribute to the lighting of the scene.
Finally I rendered a few frames to make sure my shot looked how I wanted it to. While this was just a practice it was important that I made good use of the time prior to shooting my footage to practice the techniques I would be using in the postproduction stage as I knew I would not have time to learn how to build these scenes and then actually build them to an acceptable standard in the time between shooting and handing in.